My DIY Peloton

Longer ago than I’d like to admit, I put together a DIY Peloton bike to participate in Peloton Digital classes. I used it pretty consistently at first, but never formed a habit.
While I’ve wanted to post about the project for a while, not using the setup didn’t motivate me to write about it. Here in spring 2020, SARS-CoV-2 (COVID-19) means canceled weekend plans, no trips, and no commute. All of that means plenty of time to build a new exercise habit!
I’ve reinvigorated my love of the setup, the classes, and my motivation to share how I set it all up. So now that I’ve been pretty much relegated to home for 9 weeks, I’ve built a new habit, and made some tweaks to the setup. So let’s dive in!
Why
Peloton has become an at home exercise giant, but it also comes with a significant price tag. For a while now, they’ve offered their digital content, almost all of the cycling workouts, strength training, and to the best of my knowledge, every new program they’ve added to their All-Access Membership. Take a look at the internet, and you’ll see lots of people who use the Peloton Digital Membership via tablets, phones, or the web.
From my perspective, this DIY setup was a great way to save some money, and see if this style of exercise would work well for me. I had a hunch that it would, given that I used to enjoy spin classes at a local gym (never got into that habit either, despite enjoying them). This investment felt way lower risk than the almost $3,000 first year for the Peloton bike, accessories, and 12 months of the subscription.
The Bike
For the basic bike, I followed many internet recommendations and got the Sunny Health & Fitness 49 Lb Chromed Flywheel, Silent Belt Drive Indoor Cycle Bike with Leather Resistance Pad. Despite that insanely long name, the bike is a solid, and affordable (or at least it was much more affordable when I purchased it)
Overall, it is a solid bike, relatively quiet operation for friction resistance, easy to maintain, easy to enhance, and it feels like it will last a long time.
The Accessories
Just having the bike is the bare minimum to a great workout. There are a few items you’ll want to add right away to make the most of your bike and the Peloton Digital Membership.
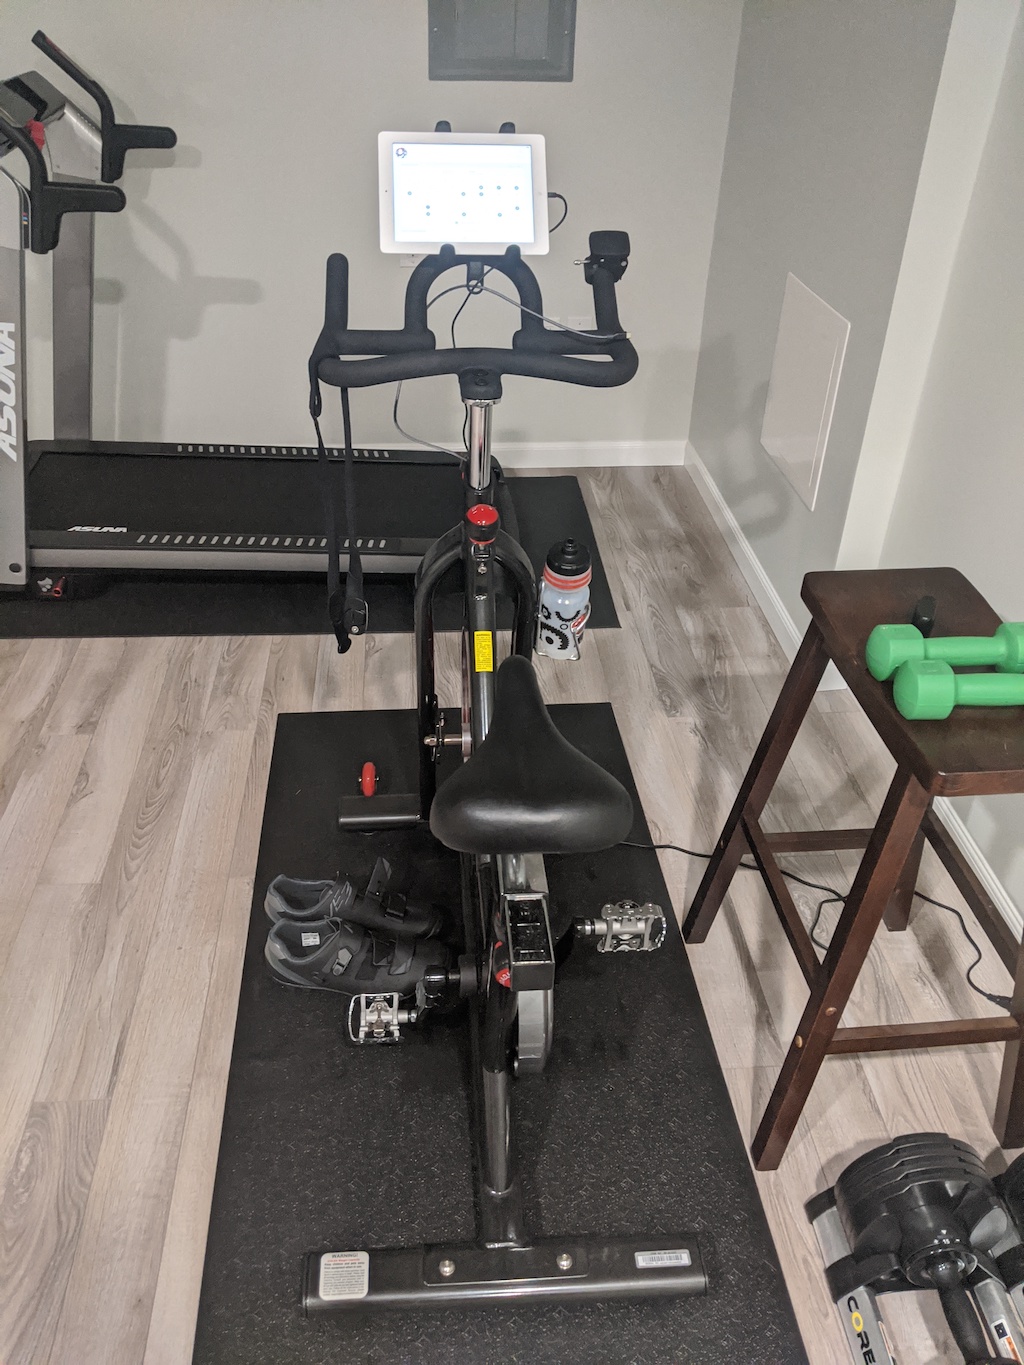
Unless you can place your bike in front of a TV with compatible streaming support, you’ll need a tablet or phone in front of you. I opted to place both an old iPad I had already, and my phone, on the handlebars of the bike.

This allows me to stream the Peloton classes as well as have my phone for another task. I use the phone and a couple Bluetooth accessories to help with measuring my effort and keeping in sync with the class.
The cadence sensor is critical to measuring my effort during the class, and the instructors call out an expected cadence while the class is ongoing. Using the Wahoo app on my phone allows me to keep the display of cadence in front of my while the class content streams to the iPad. The heart monitor is useful to measure how hard I’m working, and helps the Wahoo app give me an estimate on the calories burned. Since neither the iPad app nor the Wahoo app can measure the resistance setting of the bike, heart rate is the best measure of output I’ve got to know how hard I’m working.
Finally, I want to make it easy to keep the iPad and my phone charged, so a simple USB charger and some long 6ft cables zip-tied to the bike frame make it easy.
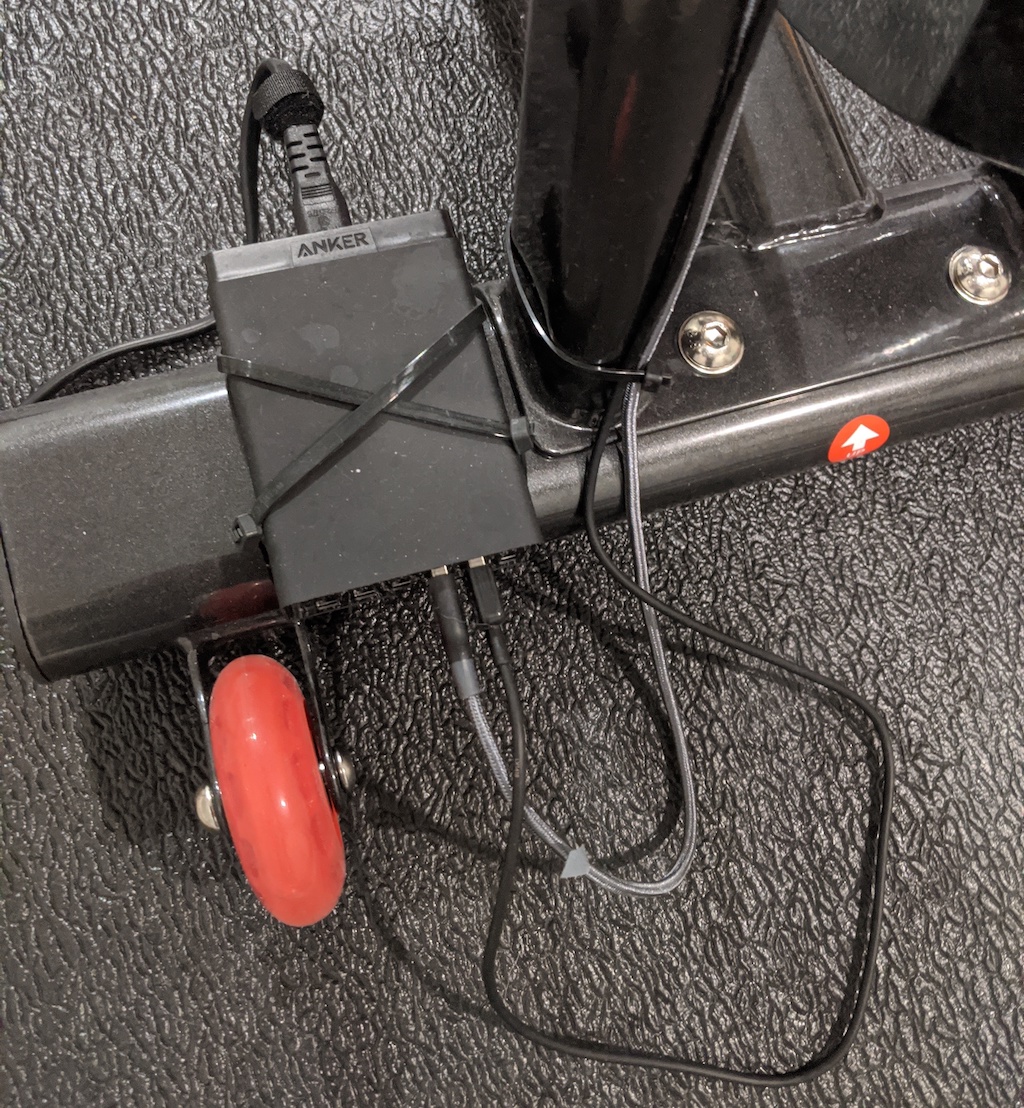
The end result looks pretty good!

The App
The Peloton Digital apps are pretty good. On my iPad it provides a decent view of all the classes, good options to filter, and the ability to preload the video so you don’t need to stream a previously recorded class on demand. With the Peloton Digital Membership, I’ve event been able to participate in live classes. My iPad is pretty old and no longer receives iOS updates from Apple, so I believe I’m no longer getting updates of the Peloton app itself, but so far it is still working.
On Android, the app is very similar, and would meet your basic needs. It doesn’t appear to allow for preload of classes, and the profile stats are more limited. The Android app also supports Chromecast, which is a handy way to get the video content onto a TV. I’ve used this approach to leverage some of the other content (stretching, strength, etc).
One other thing to know, the Peloton Digital Membership is only for a single member, where the Peloton All-Access Membership supports multiple users.
Issues
Bike
If you are going to have an issue with the bike off the bat, the fit is likely to be your issue. After several rides I have gotten the settings how I’d like, but you don’t have a ton of flexibility with the various adjustments. The other item to be aware of is that as a friction resistance bike, it can be a bit loud when you are moving quick under a higher resistance.
The largest annoyance by far is that you have no real measurement of resistance. The Peloton bike provides a numeric value for resistance and the instructors will call out ranges for you to set and work within. Without a numeric measurement and also that range not matching that of the Peloton bike, you are working blind in this area. The good news is that you’ll get a feel for how hard you should be working, just as relative effort compared to other moments, and the instructors will describe the effort as a flat road, moderate hill, etc.
Technology
Chromecast from Android, seriously, what? I haven’t tried this in a while, but the Android initiated Chromecast support is very problematic, and in my experience stutters and buffers pretty often, and then will rewind about a minute to resume playing. This is frustrating and really makes it useless.
What is more infuriating is that you can also initiate the Chromecast playback from the web version of the Peloton Digital app, and that plays fine. My understanding of Chromecast is that it sets up a direct stream from the content provider servers to the Chromecast, so the initiation method should be irrelevant to the quality of the playback. It seems that all Peloton Chromecasting should perform equally. It doesn’t truly matter however, as I really only use the iPad on the bike, and when I want to stream other classes to a Chromecast, I can initiate them from the Chrome browser on my phone.
Enhancements
As I started to get more active with the bike in March, I decided it would be nice to make a small enhancement. I opted to replace the pedals with SPD clip pedals, and bought some SPD shoes. I’ve never used clip-in pedals on any bike before. The pedals I bought are clip-in on one side, so I don’t need to put on the shoes every time, or someone else can use the bike SPD shoes. There is something nice about the ritual of clipping-in for a workout, as well as it does feel more solid and effective to cycle with the clip-in shoes.
Cost Comparison
The main goal of the DIY Peloton is to save money, so let’s take a look.
At the time of purchase:
| Item | Cost September 2018 | Cost May 2020 |
|---|---|---|
| Bike | ~$300 | ~$600 |
| Tablet Holder | ~$23 | ~$14 (another option) |
| Phone Holder | ~$13 | ~$28 |
| Bike Mat | ~$30 | ~$33 |
| Cadence Sensor | ~$40 | ~$40 |
| Heart Monitor | ~$50 | ~$80 (another option) |
| USB Charging Block and Cables | ~$46 | ~$22 + Cables |
| iPad | Already Owned | ~$330 |
| Weights | Already Owned | ~$11 |
| Total | ~$502 | ~$1158 |
Enhancement Items Added Spring 2020
| Item | Cost |
|---|---|
| SPD Shoes | ~$100 |
| SPD Pedals | ~$38 |
Recurring Cost:
| Item | Peloton Digital | Peloton All-Access |
|---|---|---|
| Monthly | ~$14 | ~$39 |
| Annually | ~$168 | ~$468 |
In May 2020, looking at the “Works Package” from Peloton, which has a similar setup of gear (shoes, mat, weights, heart monitor, etc), we are looking at a retail price of $2,494. Looking then at the 1 year costs, the ownership of the Peloton is $2,962. My first year cost of ownership (given my already purchased iPad and weights) was $670. One note, the Peloton Digital Membership used to be a bit more, but I don’t recall when it exactly went down. Even if I had needed to purchase the weights and iPad, I’d be looking at a one year cost of ownership of $1,011. For a new purchase today, with slightly higher costs on several items, the first year would cost $1,326. The DIY approach saves at least half the cost of the full retail Peloton.
Conclusion
This is a great option! You can get started for far less than the ‘real’ bike. There are downsides, but they don’t stop you from getting a great workout or building positive habits. I’m certain the Peloton Bike is very nice, and the software that goes with it appears to be much stronger and more engaging software. Ultimately I recommend the exercise program that Peloton has developed, and would recommend it to anyone interested. How you decide to get involved, and what level of investment you make is of course up to you!
It always helps to have a gym buddy!